Showing posts with label podcast. Show all posts

Saturday, December 26, 2020

Learning to Reflect Module Version 3.0 the 2020 COVID-19 Pandemic Edition

"Learning to Reflect" is a module for the ANU TechLauncher program developed in late 2018 and first run in semester 1, from February 2019. This was designed for blended delivery, with the option of easy conversion to full online delivery. That option was needed for Semester 1, February 2020 due to COVID-19,. The two face to face workshops were replaced with Zoom video conferences. The online content and activities were unchanged.

The assessment was removed from two online quizzes and forums, leaving just two assignments to provide 20% of Techlauncher assessment. This was done in an attempt to reduce the burden on students, and staff, who were suddenly required to change from face-to-face to online learning. The students still had their tutors at Zoom video-conferences, to help them keep up with their studies.

About 90% of students still completed the quizzes, despite them not counting towards assessment. In contrast, about 90% of students did not post regularly to the online forums. The difference may be because the quizzes were quick and easy to complete, being multiple choice, whereas the forum posts required composing text. Also the quizzes returned instant feedback in the form of connect/incorrect and a numeric score, whereas there was no automated feedback in the forums. When the forums are assessed, there is feedback from students (which is also assessed). However, some form of tutor-bot might be useful to give instant feedback.

A paper on the design and blended delivery of the module is available:

Worthington, T. (2019, December). Blend and Flip for Teaching Communication Skills to Final Year International Computer Science Students. In 2019 IEEE International Conference on Engineering, Technology and Education (TALE) (pp. 1-5). IEEE. https://doi.org/10.1109/TALE48000.2019.9225921

Monday, February 10, 2020

Reflecting on Reflecting on Learning

Learning to Reflect" blended module. This is the last assessed task for students undertaking the ANU Tech Launcher program before they graduate. Last semester the students read notes, watched videos, did an online quiz, participated in an on-line forum (with peer assessment), then a face-to-face workshop (run by Tempie Archer, from ANU Careers). They then submitted and assignment (with peer feedback), and repeated the process. That all worked well, but was seem by the students, and my colleagues, as too complex, and too much work. There was too much to read, too many assessment items, and too much peer assessment. Also the tutors, who the students have for face-to-face tutorials, felt excluded from the process.


Thursday, February 6, 2020

TARDIS to Record for Off-campus Students

ANU One-Button-Studio
If educational institutions need to record audio podcasts or videos, due to the Novel Coronavirus, they can use a TARDIS, as ABC Radio refer to their small soundproof recording booths. Educational institutions can purchase such booths in kit form, or build one in a small store room, lined with sound absorbing panels. The booth may have recording equipment installed, with easy to operate controls, for a One-Button-Studio: insert a flash drive, push the button, and start talking. But before building a booth, or studio, look around your campus and see if there is one already set up.

Saturday, October 19, 2019

Blending Soft Skills for University Graduates

Wall mounted LCD screens and desks on wheels at ANU Marie Reay Teaching Centre
Wall mounted LCD screens
& desks on wheels at
ANU Marie Reay Teaching Centre
On 20 November I am speaking at the ANU TELFest technology-enhanced learning conference, on How to blend and flip a course for a flatpack classroom. This is for ANU staff, but I would be happy to speak on this elsewhere. In particular I will be in Sydney 28 to 29 October, and Perth on Wednesday 13 November, if anyone would like to provide a venue and an audience.

Wednesday, August 14, 2019

Learning to Reflect Module Version 2.0

I have updated my "Learning to Reflect" learning module for the ANU TechLauncher program this semester. The students are guided in how to prepare a job application. In the process they learn long term professional skills to identify their development needs, how they will acquire these and to reflect on what they have learned. The materials are available under a creative commons license for modification and reuse.

Introduction


The notes and videos contain content intended for instructors, as well as students, to be used in conjunction with online exercises, and face-to-face workshops. Students will be prompted by the Moodle Learning Management System, as to which parts to read, and when to read them.


1. Learn


In this first of two parts, you will investigate what you need to learn for your project, and long term for your career. In scope here, are both technical skills and also professional and teamwork skills. The aim is to prepare you to be a professional in your field, which includes the ability to take charge and responsibility for your future professional development.


2. Report and reflect


In this second and last part, you will reflect on what you have learned. The assignment task is to select a real position to prepare an application cover letter for, and revise the responses to selection criteria prepared in assignment 1.


Appendixes

Tuesday, August 6, 2019

Learning to Reflect Videos


Having revised the "Learning to Reflect" module notes for ANU TechLauncher students, it was time to revise the video. This is a time-consuming and exacting process, even for someone with training in video production.

Last semester I produced this by first making a slideshow presentation, which was also used live in the classroom. I prepared a script based on what was in the module notes, rearranged to match the sequence in the video. I then turned each slide into an image, and the script into synthetic speech. The slides and audio were then imported into a video editing package and timed to match the audio. The results were not perfect, but like Samuel Johnson's piano playing dog: "It's not done well; but you are surprised to find it done at all."  ;-)

This time I decided to try Content Samurai, after it was demonstrated at PitchEd NSW. This is a web based tool which takes a script, and searches for suitable video clips, or still images,  based on the key phrases. The service will then turn the script into synthetic speech timed to the video. This process works remarkably well. The Australian accented male voice provided is much better than those I have used previously. I did have to slow down the narration to 80% of full speed, and lower the volume of the background music to 5%.

After some experimentation I found I could set the system to add a new scene for each paragraph in the script. I could then hide the text, otherwise it would put it as a caption on screen. Also I could upload my slides in place of some of the auto suggested clips. This way my slides are interspersed with the suggested filler scenes.

Here is what the video looks like generated by automatically, with the defaults (video selected from keywords, scene transitions, animated text). This version was not usable:


I then changed the settings, to use only still images, and have one per paragraph, with no animation, or scene transitions:


One problem was that rendering was very slow (but video rendering is always slow). I found it could be faster by using still images, rather than video clips. The rendering took about six minutes for a six minute video. Also I created a plain black template for the slides, with no shaded pattern.

One option I would like is to reduce the bit-rate of the audio. For an educational video you need only low quality mono sound.

One tip is to set your slide maker (I use LibreOffice) for 16:9 format slides, to match a modern widescreen TV. Then generate the slides images at the resolution required. Full HD TV is 1,920x1,080. Content Samurai produced the lower resolution 1,280x720HD TV format typically used for broadcast TV, but down sampled my higher resolution slides very cleanly.

I could not find a way to prepare closed captions within Content Samurai, so I uploaded the video to YouTube, and then downloaded the VTT file it produced. I then uploaded this to the Moodle website, for the students.

Thursday, June 27, 2019

Learning to Reflect Course Module Worked


This is the tenth of a series of posts, on how to provide students with help when preparing a reflective portfolio. A class of 78 graduate computing students completed the module, as part of ANU Techlauncher. The flipped, blended, peer assessed approach worked well, and produced outcomes comparable to conventional lectures with instructor assessed assignments. A copy of the updated course notes are available. I can also provide a Moodle backup file including all course materials, and quiz questions, to instructors.

ANU Marie Reay
Teaching Centre
In 2008 I decided to stop using lectures as part of university courses. I then spent 2009 to 2018 designing and delivering purely online courses. In February 2019 the Australian National University unveiled the Marie Reay Teaching Centre, a flexible teaching building. I was able to use the building to try out the approach of an online course supplemented with face to face workshops. This I suggest could be generally applied in higher education. I have submitted a paper on this to an international computer education conference.

Friday, April 5, 2019

Audio Slideshow for Job Application Reflection Module


This is the ninth of a series of posts , on how to provide students with help when preparing a reflective portfolio. This is an audio slideshow. The slides are based on the course notes and the audio is computer generated.

This is intended to be a demonstration of how to produce multi-media for education, quickly, and easily. The slides were produced using LibreOffice "Impress" (a free alternative to Microsoft Powerpoint). To generate slides suitable for HDTV, the presentation was exported as PNG images at 1280×720 pixels. These slides were copied into the KDEinLive digital video package, and adjusted to fit with the audio commentary. The video was rendered as 720p MPEG 4,  at 200 kbps, 24 frames per second, with 64 kbps audio.

The computer generated audio is monotonous, and the text based slides not very interesting. However, this is a good start before trying anything more ambitious. Also students are not undertaking study to be entertained, but to be educated.

ps: This is for students of  ANU Tech Launcher.

Thursday, April 4, 2019

Audio Slideshow for Job Application Learning Module


This is the eighth of a series of posts , on how to provide students with help when preparing a reflective portfolio. This is specifically for students of  ANU Tech Launcher.


Mazen Al-Ismail
Previously I provided an audio podcast for part 1 "learn". However, research by Ismail (2018) suggests some students prefer audio with slides. So I have added slides to the audio. The student can still listen to the audio, without looking at the slides, which some prefer. This is easier to create and maintain than separate video and audio versions.

Wednesday, March 20, 2019

Provide combined vod/podcasts to students

Mazen Al-Ismail
Al Ismail (2018) surveyed 345 mobile learners from Australia and Saudi Arabia as to their preferences for recorded learning material. It was found that students prefer to get their course content as a long audio podcast (15 minutes or more) for walking, but shorter vodcasts (audio with slides) in somewhere like a cafe. This makes sense: a student walking can't look at a screen, has set amount of uninterrupted time to concentrate on the narration. A student in a cafe can look at a screen, but is more likely to be interrupted, and has more auditory distractions.

One way to meet the requirements for different locations would be to produce content which are designed to be usable with the audio alone (as a podcast), vision alone (as a slideshow), or both (as a vodcast). Long vodcasts could be divided into short chapters, of one to five minutes.

It would be possible to produce the versions of materials semi-automatically.  As an example, I have produced a text-to-speech vodcast, and podcasts for the learning module "Reflective Learning". These have no structure, but the e-book they are derived from does. It would be possible to break the vodcasts and podcasts into chapters, based on the chapter and sub-chapter hierarchy of the e-book. As an example, the chapters of the e-book (indicated by HTML H2 markup) would give audio chapters of about ten minutes, suitable for walking students. Sub chapters (indicated by H3) would break the audio into two minute segments.
"In general, rich and long podcast is recommended while a student alone, even while walking, as we have seen in chapter four that Saudi students highly prefer to be engaged with m-learning while walking alone.

Students highly prefer vodcast and text respectively in busy contexts, so if possible providing slides synchronised with audio in a way that students can read the slide and opt to listen to their lecturer explanation for each slide.

Students highly prefer audio while walking alone, and this research show that Australian students prefer audio in all walking contexts. On the other hand, students dislike audio in quiet and busy contexts.

So, it is highly recommended to avoid disseminate audio podcasting in stationary context."
From Al Ismail, p. 131, 2018.

Reference


Al Ismail, Mazen Ibrahim I (2018-12-17). The impact of learners' characteristics on m-learning preferences, and how m-learning preferences form choices in different contexts. URL http://hdl.handle.net/1885/154711

Tuesday, March 12, 2019

How to Blend and Flip a Course for a Flatpack Classroom

Next Friday, 15 March I will be speaking on "Blend, Flip, and Back to the Classroom". So I thought I should collect my thoughts on what to say. Here are some note, so far:

In 2008 I ended my last lecture for the year at ANU by announcing it would be my last lecture, ever. Having become disillusioned with the lecture format, I have been teaching online for the last ten years, with an award winning course offered by three institutions, in Australia and North America. During that time I looked at alternative classroom designs in Australia and around the world.

In February 2019 the Australian National University unveiled the Marie Reay Teaching Centre, a flexible teaching building. So this year I am going back to the classroom, to apply what I have learned, with a blend of online and classroom teaching in the new building. This is intended to be a model for how academics can easily convert conventional courses to new interactive ways of learning, and allow each student to choose the blend of online and classroom learning to suit their needs.

Overview of the Learning Module


I produced slides, and a video for the revised learning module, on how to provide students with help when preparing a reflective portfolio. This is for students of  ANU Tech Launcher, but intendeds to be able to be used more widely. The module has two parts, with the same format: read the notes, do an online quiz, participate in an on-line forum with peer assessment, then a face-to-face workshop, lastly do an assignment with peer feedback.

New Flexible Teaching Spaces at ANU

ANU Marie Reay Teaching Centre
The Marie Reay Teaching Centre opened at ANU 25 March, along with the Culture & events building opposite, both by Architects BVN. These buildings have flexible teaching spaces, but flexible in different ways. The culture and events building has a 500-seat auditorium, and a 200 seat flexible space. Both of these have tiered lecture theater style seating, but which retracts electrically, providing large flat floor spaces, with high ceilings.

In contrast, the Marie Reay Teaching Centre has only flat floor classrooms, for 30, 60, or 120 students. The flexibility here is provided by retractable walls, furniture on wheels, and electronic screens on multiple walls.

147 seat seminar room,
ANU Sciences Teaching Building


This approach of one building with lecture theaters, and one with flat floor classrooms, differs from attempts to combine the features of the two. As an example, the ANU Sciences Teaching Building has a 147 seat tiered seminar room. The room has wide tiers with fixed tables for groups of seven students. This is designed so students can watch a presentation at the front of the room, and then discuss it in a group, around their table. However, the tables take a lot of space and are fixed in place. Display screens on the tables block some of the view.

In contrast, the ANU Kambri complex has two buildings with specialized seating for specific pedagogy. The ANU Cultural Centre Building has high density tiered theater fixed seating for lectures. Opposite is the Marie Reay Teaching Centre with low density flat floor movable seating and tables for group work. This has the advantage that both format rooms can be used simultaneously. and offer a greater overall seating capacity, than would general purpose lecture/group rooms.
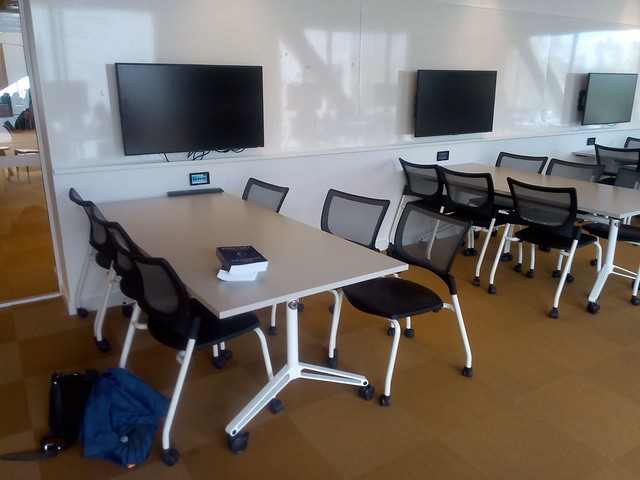
Wall mounted LCD screens and desks on wheels at ANU Marie Reay Teaching Centre
Wall mounted LCD screens
& desks on wheels at
ANU Marie Reay Teaching Centre
While the tables in the Marie Reay Teaching Centre are on wheels, one room (4.02) has five electronic screens on each side wall, spaced to allow each of five desks to have a screen (for a total of sixty students). This overcomes the problem of the desks becoming immovable, when computer screen are installed on them.

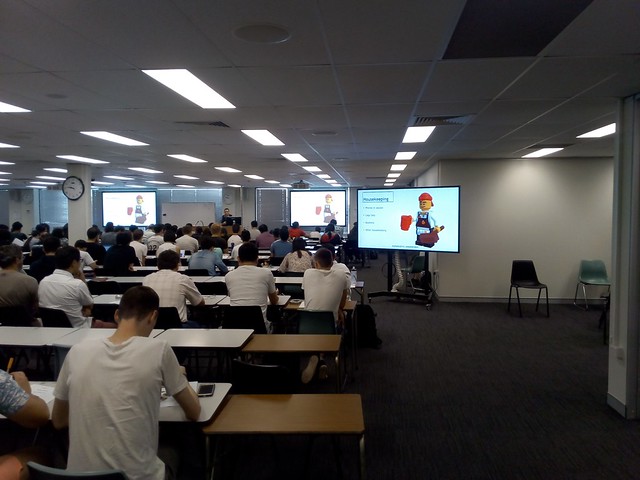
Students doing a Lego Serious Play exercise at the Australian National University in Canberra
Screen of Wheels, in use at the
ANU Barry Drive classrooms,
for ANU TechLauncher group activity
Other rooms have two projection screens for presentations. I have suggested these be supplemented with screens on wheels, which can be positioned for group work, or to display what is on the main screens. Such screens on wheels have been used at the ANU Barry Drive classrooms for an ANU TechLauncher group activity.

Top Down Course Design

My approach to course design reflects the limited flexibility of the new buildings. Flexibility is provided, but not at the expense of efficiency.

The learning is designed top down: start with the learning objectives, or externally set requirements. These set, in broad terms, the knowledge and skills the student must have on completion of the course.  Often these objectives are not provided to the educational designer, or are so vague they are of little use, so they have to be found, or invented.

For the Reflective Learning module, I first tried adapting skills definitions from the Skills Framework for the Information Age:
"Upon completion of this module, students will be able to:
  1. Determine their own learning needs and possible sources, to develop individual skills for a project and for their career development.
  2. Identify appropriate accreditation and qualification paths. 
  3. Manage the learning, and evaluate its effectiveness through through reflection."
 From the skill "Learning and Development" (ETMG), Level 6, SFIA, Version 7, 2017. As used in "Learning to Reflect" (Version 0.1), February 4, 2019.
SFIA is used by the Australian Computer Society for accreditation of Australian university degrees, and by some employers in defining jobs. It is useful to have course objectives aligned with SFIA, to make accreditation quicker, and so graduates can easily show employers they have required skills.

However, as I writing a module for use in an existing course, and that course was not aligned with SFIA, this approach did not work. In a later draft I replaced the SFIA objectives, with ones from the course definition:
"The module is aligned with two of the outcomes for the course:
3. 'learn any specific technical skills required by their topic, and apply them to project work.
4. apply and deepen skills in oral and written communication, and apply these in a project context.'
From Computing Project, Course COMP8715, ANU, 2019. URL https://programsandcourses.anu.edu.au/course/comp8715" as cited in "Introduction", of Learning to Reflect, Version 1, February 13, 2019.

Aligning Assessment with Leaning

My usual approach is to continue the top down development, by providing one major assessment task for each learning objective. However, in this case the final assessment task was already set by the existing course the module. So I have to set other assessment around this.
The main issue the module was intended to address was the difficulty Masters of Computing students had with the large assessment task at the end of semester. The obvious solution was to break this assignment into pieces delivered in sequence. However, the same assessment task is undertaken by students in multiple courses, all of whom are in the same tutorial group with the same tutor. Having different versions of the assignment for different students would be confusing for tutors and students.

Chunky Blended Learning

Designing learning takes time. I started designing the learning module in late 2018. At that time I was not sure if the new classrooms would be completed for first semester 2019. Even the week before semester started in February 2019, there was construction equipment around the building. However, this was quickly cleared away and the building opened on time, with the classroom equipped.

However, in late 2018 I could not be certain everything would be ready. So I used a conservative approach to blended course design, using what  Fleck (2012) refers to as "chunky" blended learning:
'The term "blended learning" usually refers to a mix of conventional face-to-face elements combined with on-line elements. However, this is at too general a level for in depth analysis, while the term "blend" perhaps suggests too homogeneous a mix: in practice the mix is more "lumpy", more a chunky fruit salad than a blended smoothie. At one extreme it is becoming routine for campus-based virtual learning environments (VLEs) to be used to provide additional notes and materials supporting conventional lectures.'
From Fleck (2012).
 The design is essentially a distance education course, with face-to-face workshops added. The learning management system (LMS), in this case Moodle (part of ANU's Wattle system) is used for providing students with course notes, videos, podcasts and other materials. The LMS is also used for routine announcements to the class, and individual communication with students. Small assessment tasks (quizzes and forum posts) are provided via Moodle's quiz and forum modules. Assignments are similarly done using the workshop module of Moodle.
As it was not clear what classroom would be available, the workshop design was kept general, and drawing on the preceding online activities.
  1. Announcements: General announcements while students set up the room.
  2. General Questions: Students can ask for clarification on administrative, content and assessment questions. Groups first discuss the question and if they are not  sure of the answer it can be put to the whole room.
  3. Forum Questions: Discuss your answers to this week's forum questions.
  4. Assignment Master Class: Bring along your draft assignment, ask for feedback from your group. Be prepared to put it up on the big screen for group feedback.
  5. Wrap-up: Any concluding remarks by students and instructors.
The same  format is used for all workshops, so that staff and students can become familiar with it. This avoids limited class time being taken up with explanations of complex exercise formats.

Chunky Online Learning

As well as the blended and online learning being chunky, the online component is in large chunks. The student is provided with a package of material for two weeks. This has notes, suggested readings, a quiz, discussion questions, workshop, and assignments. While the student is expected to undertake the work in this order, exactly what they do when in the two weeks is left largely to the individual.

This contrasts with tightly scripted online learning modules which give the student a few paragraphs to read and perhaps a video, then an automatically marked question they have to answer before proceeding to the next item. Such packages require considerable design and testing if they are not to hold up and frustrate students. Also these tend to require a high speed reliable network connection to function. In contrast the chunky approach allows students to download material, and use it offline.

References


Fleck, J. (2012). Blended learning and learning communities: opportunities and challenges. Journal of Management Development, 31(4), 398-411. http://dx.doi.org.virtual.anu.edu.au/10.1108/02621711211219059 
Worthington, T. My Last Lecture, Net Traveller (Blog), August 20, 2008. URL https://blog.tomw.net.au/2008/08/my-last-lecture.html 
Worthington, T., "A Green computing professional education course online: Designing and delivering a course in ICT sustainability using Internet and eBooks," Computer Science & Education (ICCSE), 2012 7th International Conference on , vol., no., pp.263,266, 14-17 July 2012 URL: http://dx.doi.org/10.1109/ICCSE.2012.6295070 Preprint available at: http://hdl.handle.net/1885/9013 
Worthington, T. Learning to Teach in the New ANU Teaching Building, Higher Education Whisperer (Blog), February 11, 2019. URL https://blog.highereducationwhisperer.com/2019/02/learning-to-teach-in-new-anu-teaching.html 
Worthington, T. Helping Computing Students Prepare a Reflective Portfolio: Parts 1 to 7, Higher Education Whisperer (Blog), November 28, 2018 to February 13, 2019. URL https://blog.highereducationwhisperer.com/search/label/Reflective%20Portfolio%20Course

Wednesday, February 13, 2019

Shorter Learning Module for Teaching Students to a Write Job Application

This is the seventh of a series of posts , with a revised learning module, on how to provide students with help when preparing a reflective portfolio. This is specifically for students of  ANU Tech Launcher

Previously I provided three parts (1. Plan, 2. Learn, & 3. Report and reflect). However, that was far more work than a student could do in the available four hours study. So I have deleted part 1. Some of the content on learning has been moved to the next part "Learn", but the rest has been deleted. Also I have made all readings "suggested", not required. The SFIA learning objectives have been replaced with two from ANU Techlauncher (which the module is part of).

Also I have added a video with commentary to introduce the module, and audio podcasts for parts 1 & 2. The audio is text-to-speech, using Animaker's Australian English voice "Russell". I am not that good a speaker, and it would take a long of time to come up with a good narration. As it is, I can copy the notes to a text file. I then insert pauses at the ends of paragraphs, and replace abbreviations (such as "ANU", which would be pronounced as "Arrnoo"). I can simply edit the text and regenerate the audio, in a few minutes.

Table of contents

Introduction
1. Learn
2. Report and reflect

Appendixes

Sunday, October 22, 2017

Use an external microphone for podcasts and webcasts from smartphone

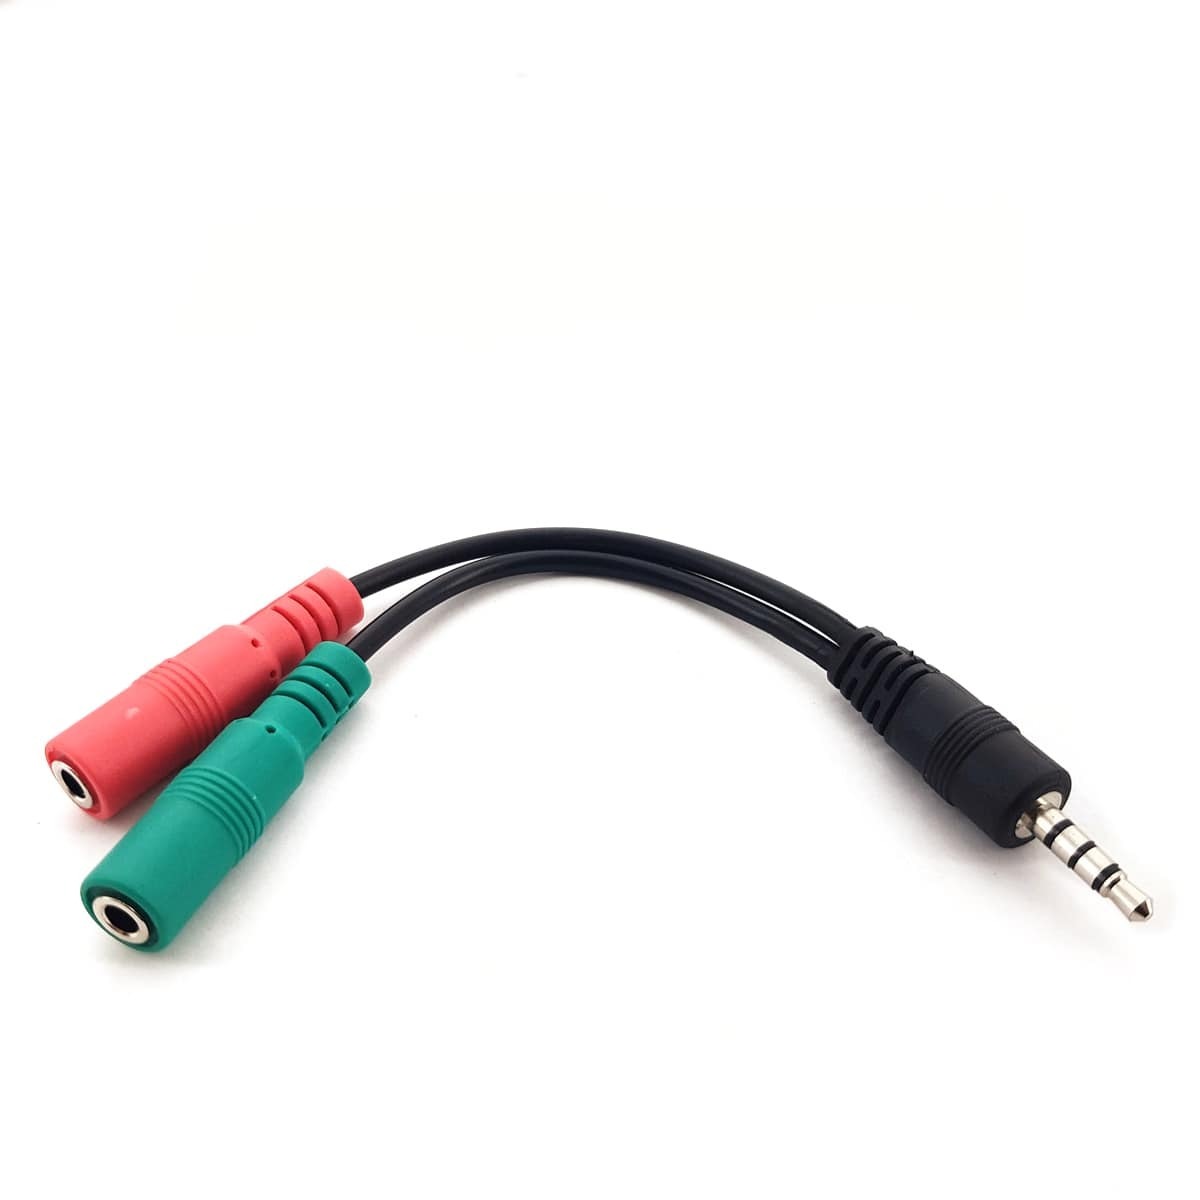
A smartphone is convenient for taking part in a webinar, or for recording a podcast. You need not be limited by the microphone in the phone. A desktop microphone can be connected via a splitter cable. The cable has a plug for the phone (usually a 3.5 mm four pole "TRRS") at one end and sockets for a microphone and headphones at the other.

I tried soldering my own adapter from plugs, sockets and cable, but I ended up with a short-circuit and burnt fingers. The "3.5mm TRRS Smartphone - Mic and Headphone Splitter" from Swamp Industries in Canberra was cheaper than the parts and actually worked. The only problem with the Swamp unit is that it has a volume control for the audio output. There is no indicator on the volume control, so it s easy to set it to minimum and wonder why there is no sound. Similar units are available from electronics stores and Amazon, without volume controls.

Tuesday, September 26, 2017

Podcasting Booth

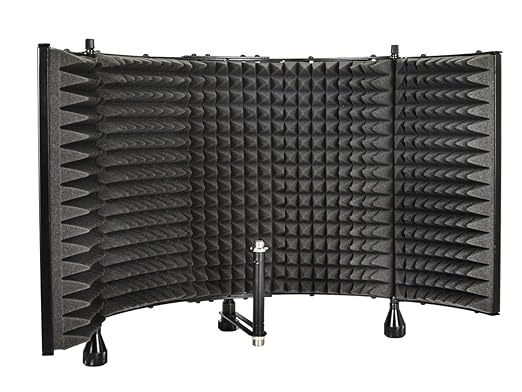
One of the problems with making podcasts and videos is where to record the audio and video. Few can afford a dedicated, purpose built soundproof studio. There are options from a desktop microphone isolation shield made from about US$12 of material to a mini-recording studio costing thousands of dollars.

For audio only, you can use a "Microphone Isolation Shield". This is curved sheet of sound absorbing material placed around three sides of a microphone. You place your head into the open side and the material shields much of the extraneous noise. These cost around US$100, but one of my colleagues has built one from acoustic foam panels (about US$12). This might be used for a talking head video, by placing the camera at the back of the shield. But it would be better for a voice-over of a slide show.

On a larger scale the Inspire Center at University of Canberra have a library style carrel covered with carpet. It is remarkable how quiet this is when you sit in it, with the material on the side walls and top absorbing outside noise. With a suitable backdrop, this could be used for video as well.

The Inspire Center also has a "podcast" room, which is essentially a small soundproof audio recording studio. This is needed for recording high quality podcasts. Otherwise stray sounds, which are not evident to someone in the room can be distracting on recordings.

Peter Capaldi, who played Doctor Who, at the ABC's TARDIS control room
One step up are the telephone box sized radio interview booths at the Australian Broadcasting Corporation, colloquially known as a "TARDIS". These are lined with acoustic panels. The booths are used for audio only, but with a backdrop this set-up could be used for a talking head video.

Thursday, July 18, 2013

Audio Recording Options for an On-line Course

Recently I was asked about recording options for on-line courses. The simplest recording option when creating an on-line course is not to use any audio or video. I created a whole 12 week course for which I recorded no audio and no video. I do refer the students to relevant video and audio produced by others, but I only supply text myself. This course, "ICT Sustainability", is popular with students and got me an award from my peers.

When I am producing audio I use a USB Headset. This puts the microphone close to the mouth and the audio is digitized in the headset, which improves the quality. MP3 is fine for the audio format.

If you are recording with a live audience, see if your institution has a built in recording option. The Australian National University has lecture theaters equipped with a recording system which takes the audio from the room PA system and the video from the main screen. This saves having to worry about a separate microphone. I just have to remember to press "Record" at the start and "Stop" at the end and a podcast is produced. The ANU system is called the Digital Lecture Delivery Service and many universities have similar facilities.